Keeb VeeTwo
I've always been a fan of tactile controls. And I think a cheap low quality knob can totally ruin a the premium feel of an otherwise great piece of tech. I had spent sometime looking for a custom keyboard or controller that included a few knobs or dials. While its really common to find a keyboard with one volume knob, there are almost none with multiple. So when I couldn't find what I was really looking for I set out on making it for myself. What followed was a project that lasted well over a year, had a handful of prototypes and more than a dozen revisions.
The hardware:
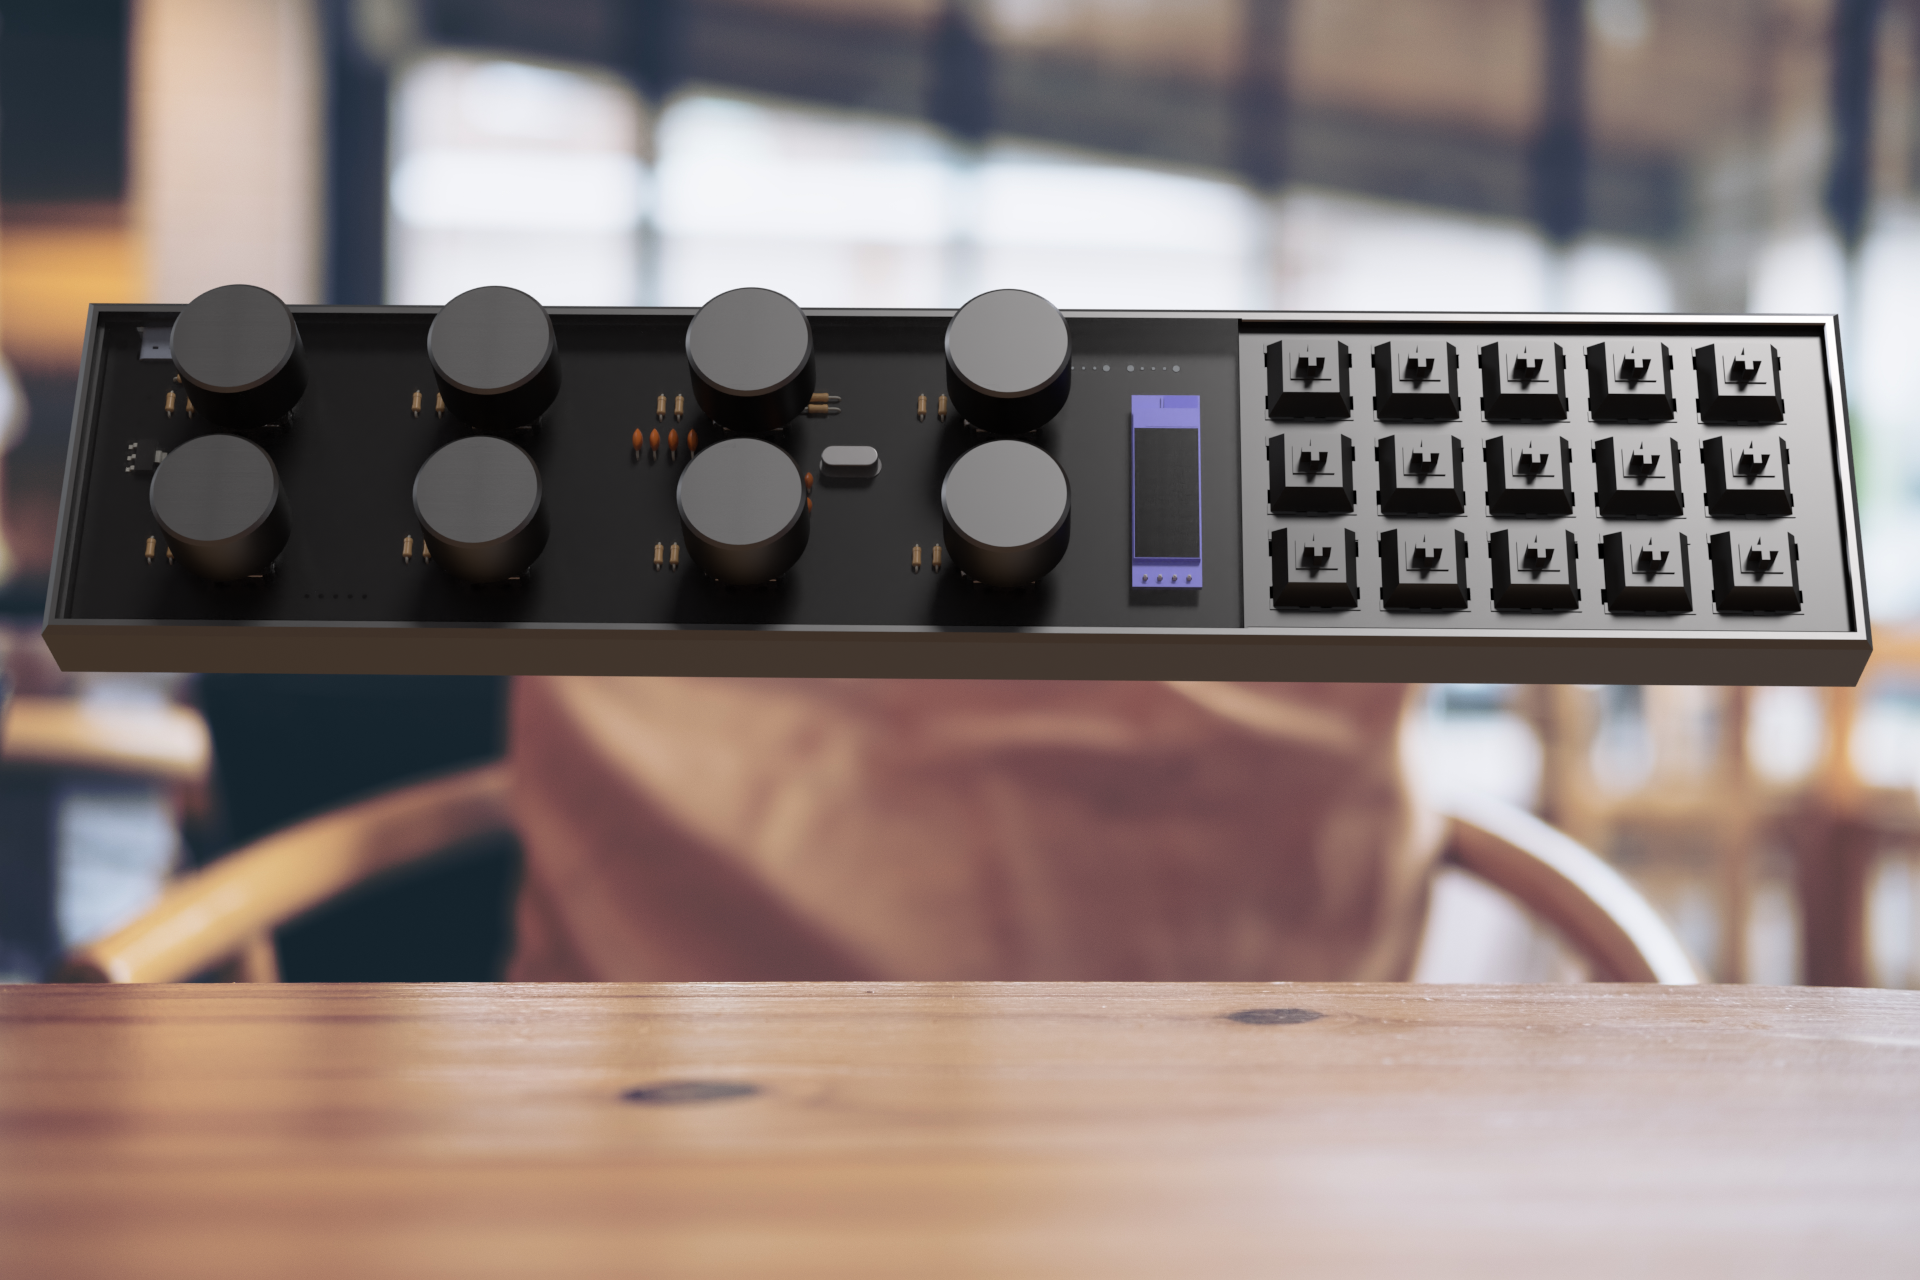
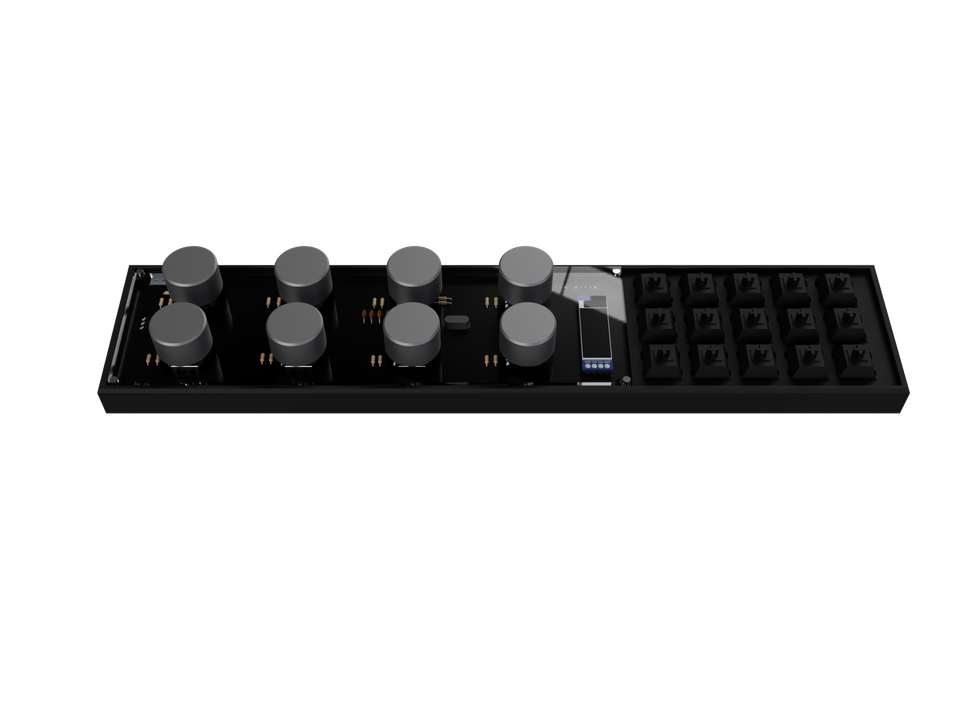
My first step was drawing out what I wanted the end product to look like. A quick sketch later and I had the basic design that looks nearly identical to the final product. From there I opened up Fusion 360 and got modeling. Within a few hours I had the basis for the case, the top glass cover, the layout of each rotary encoder, and the grid for each key.
From there I started sourcing parts. My main focus was finding a rotary encoder that felt right. I wanted a nice smooth, heavy action that never felt loose or sticky. My first order had a dozen different encoders that all fit the bill on paper. But once they were in hand only a few that made the cut.
With the encoders and switches in hand I got to prototyping. My first iteration was with an old Arduino I had kicking around. Just something to get the hang of interfacing with the encodes, and building a key-switch matrix. Functionally every mechanical keyboard out there uses a key-switch matrix. Most low cost MCUs don't have enough GPIO pins to connect each switch individually. A key-switch matrix reduces the number of GPIO pins to a sum of the number of rows and columns. So for my 3x5 layout I would only need 8 pins and not 30.
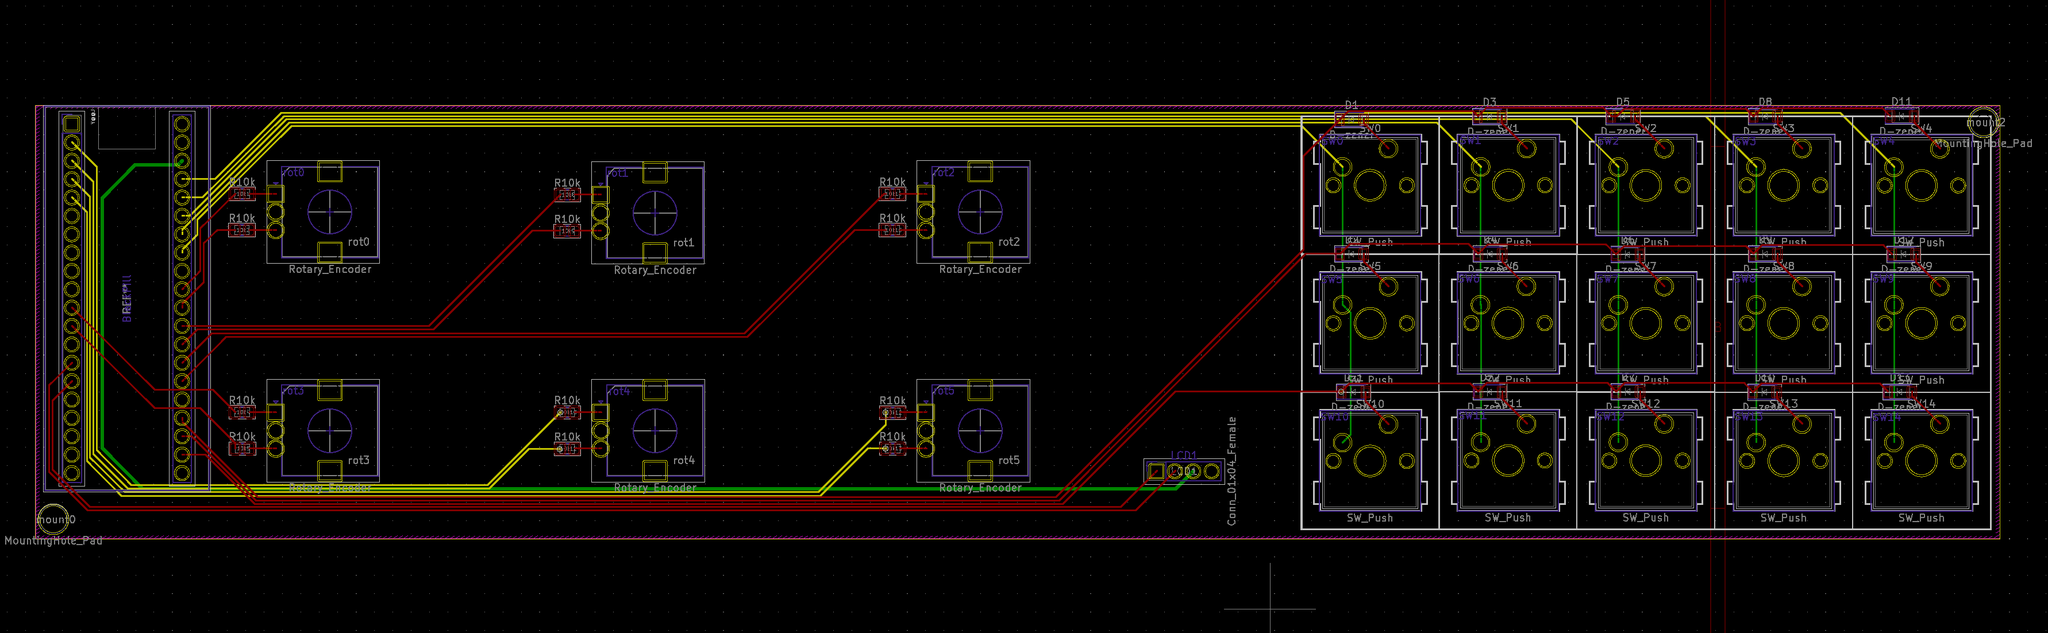
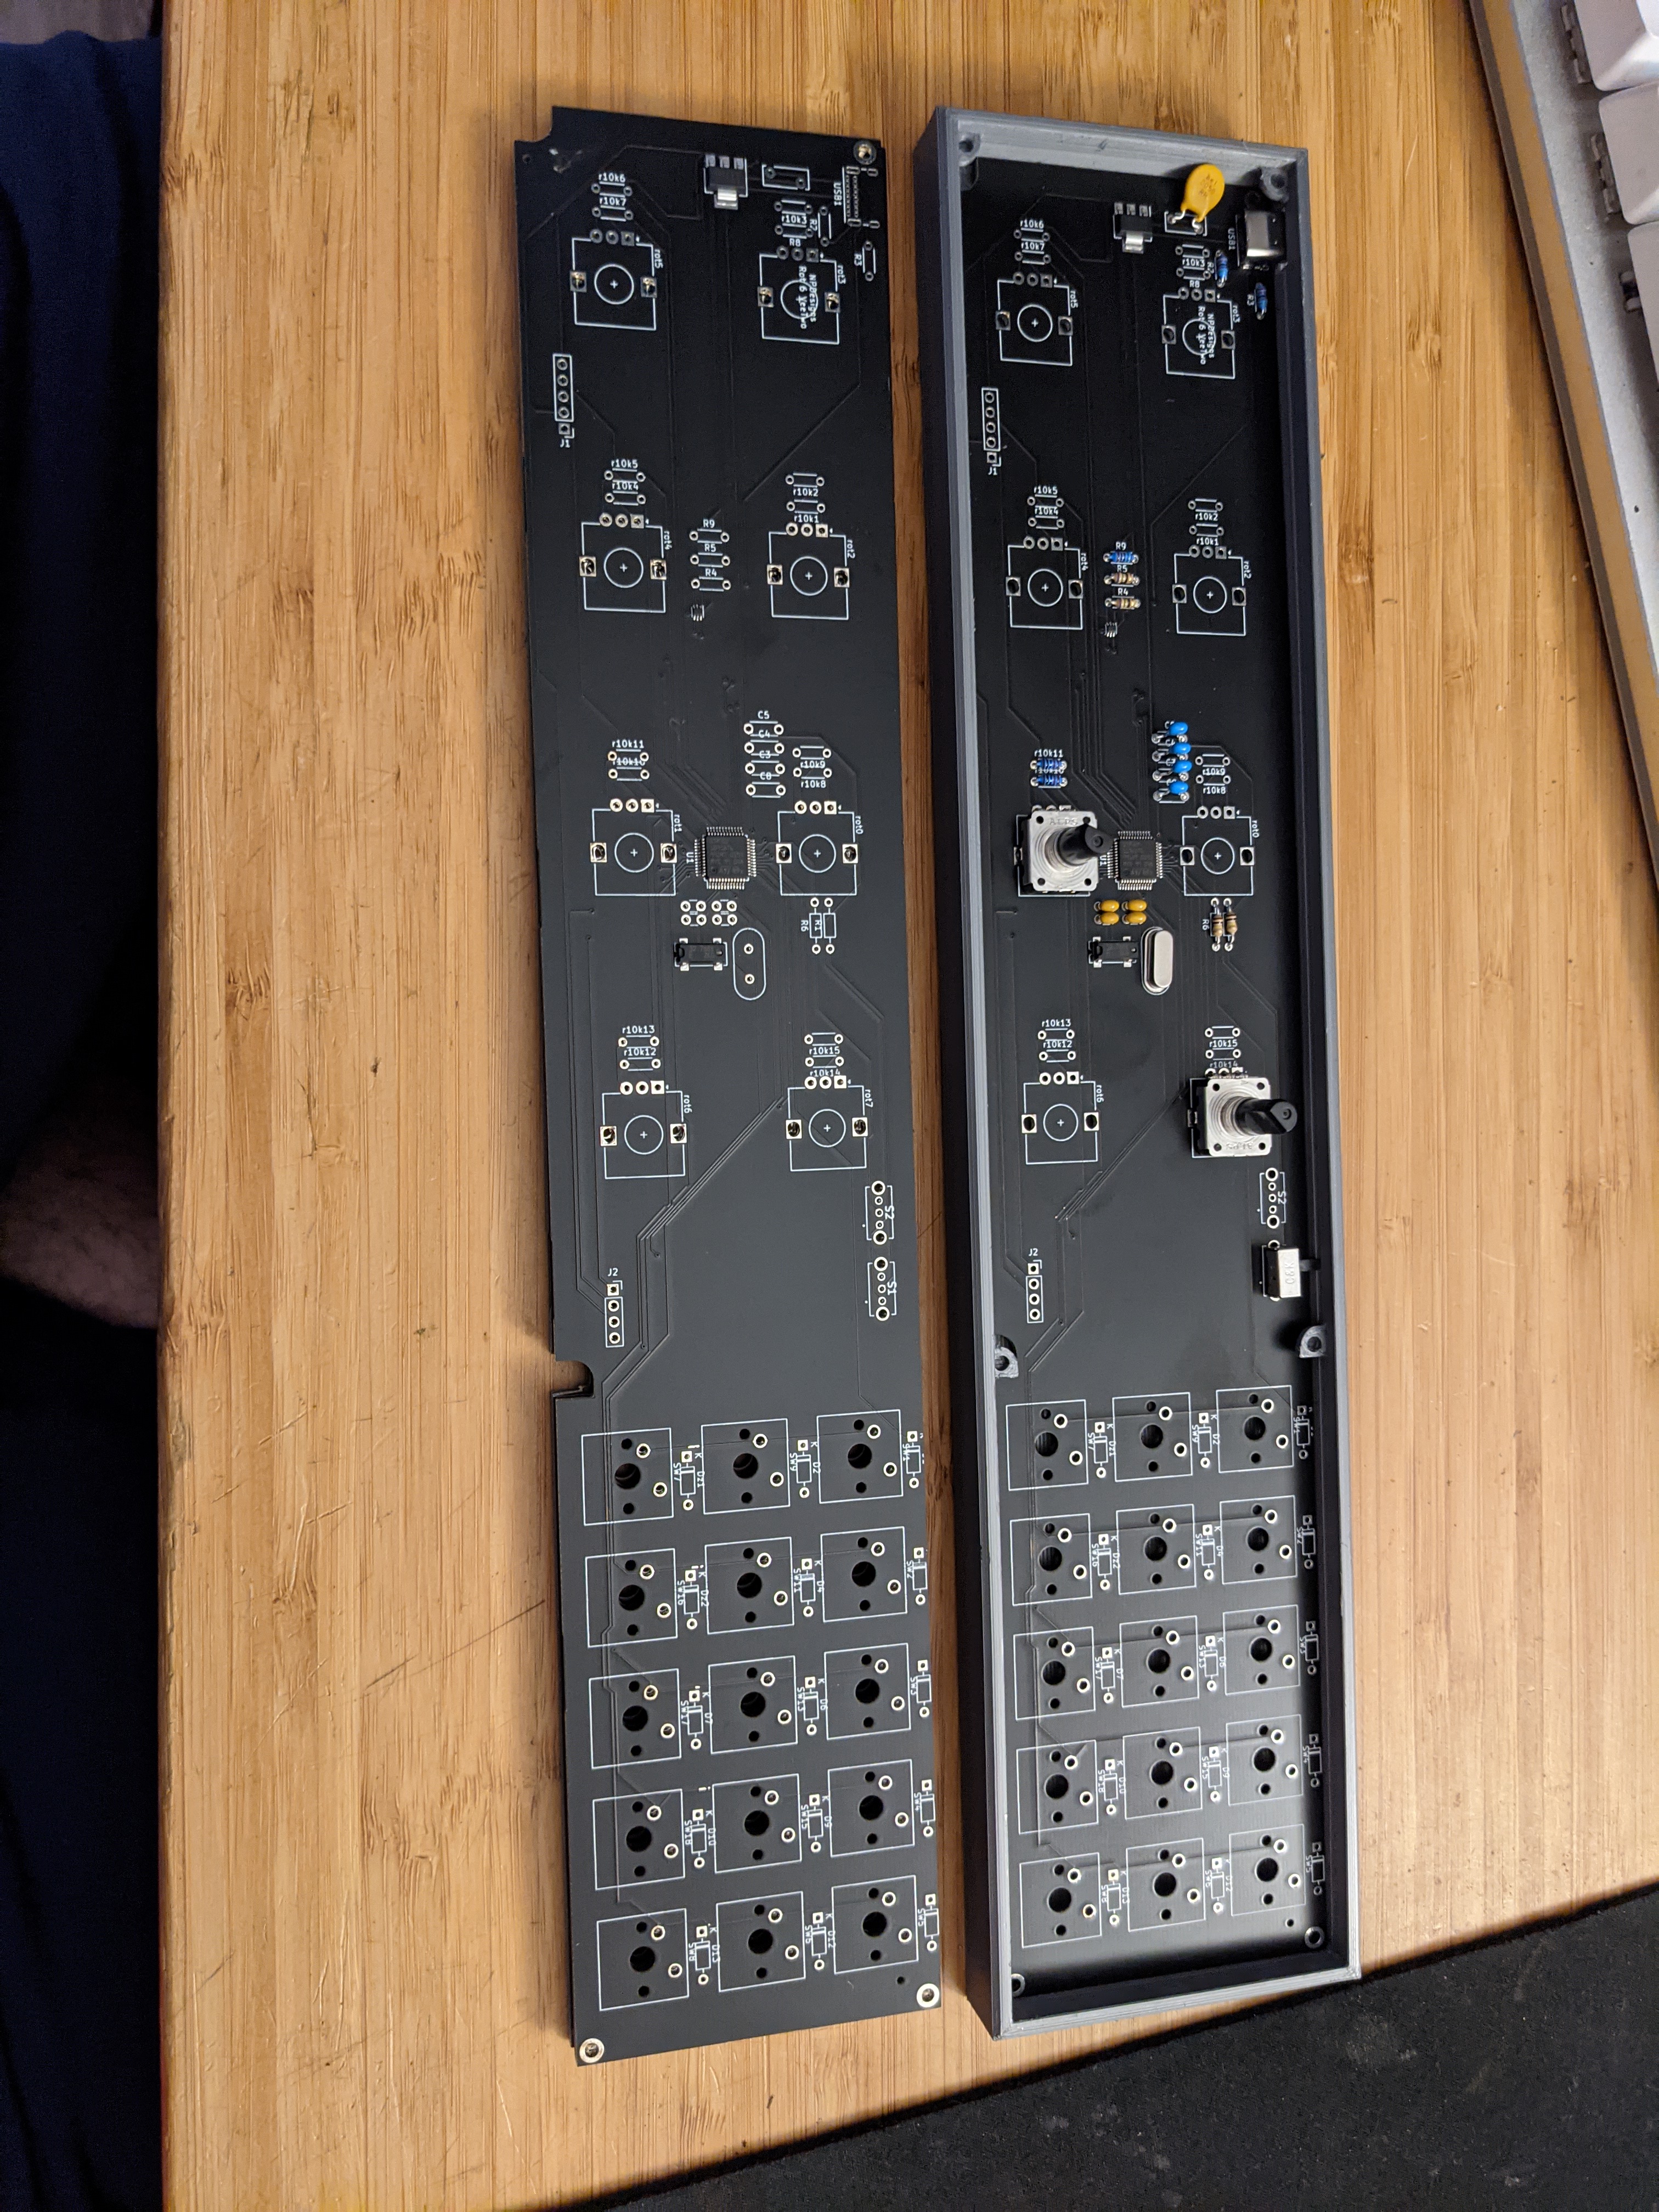
The PCB was an interesting challenge for sure. I had never designed a PCB before, but downloaded KiCad and just dug in. The schematic was built using the recommendations and information from the data-sheets for each component. The PCB layout was then made to match the 3d model I had already built. The first version took hours to get routed and cleaned up. From there I spent the next couple days looking over it, going over my checklist and wiring diagram and checking that everything was perfect. I submit an order to have them made, and immediately noticed half a dozen minor issues.
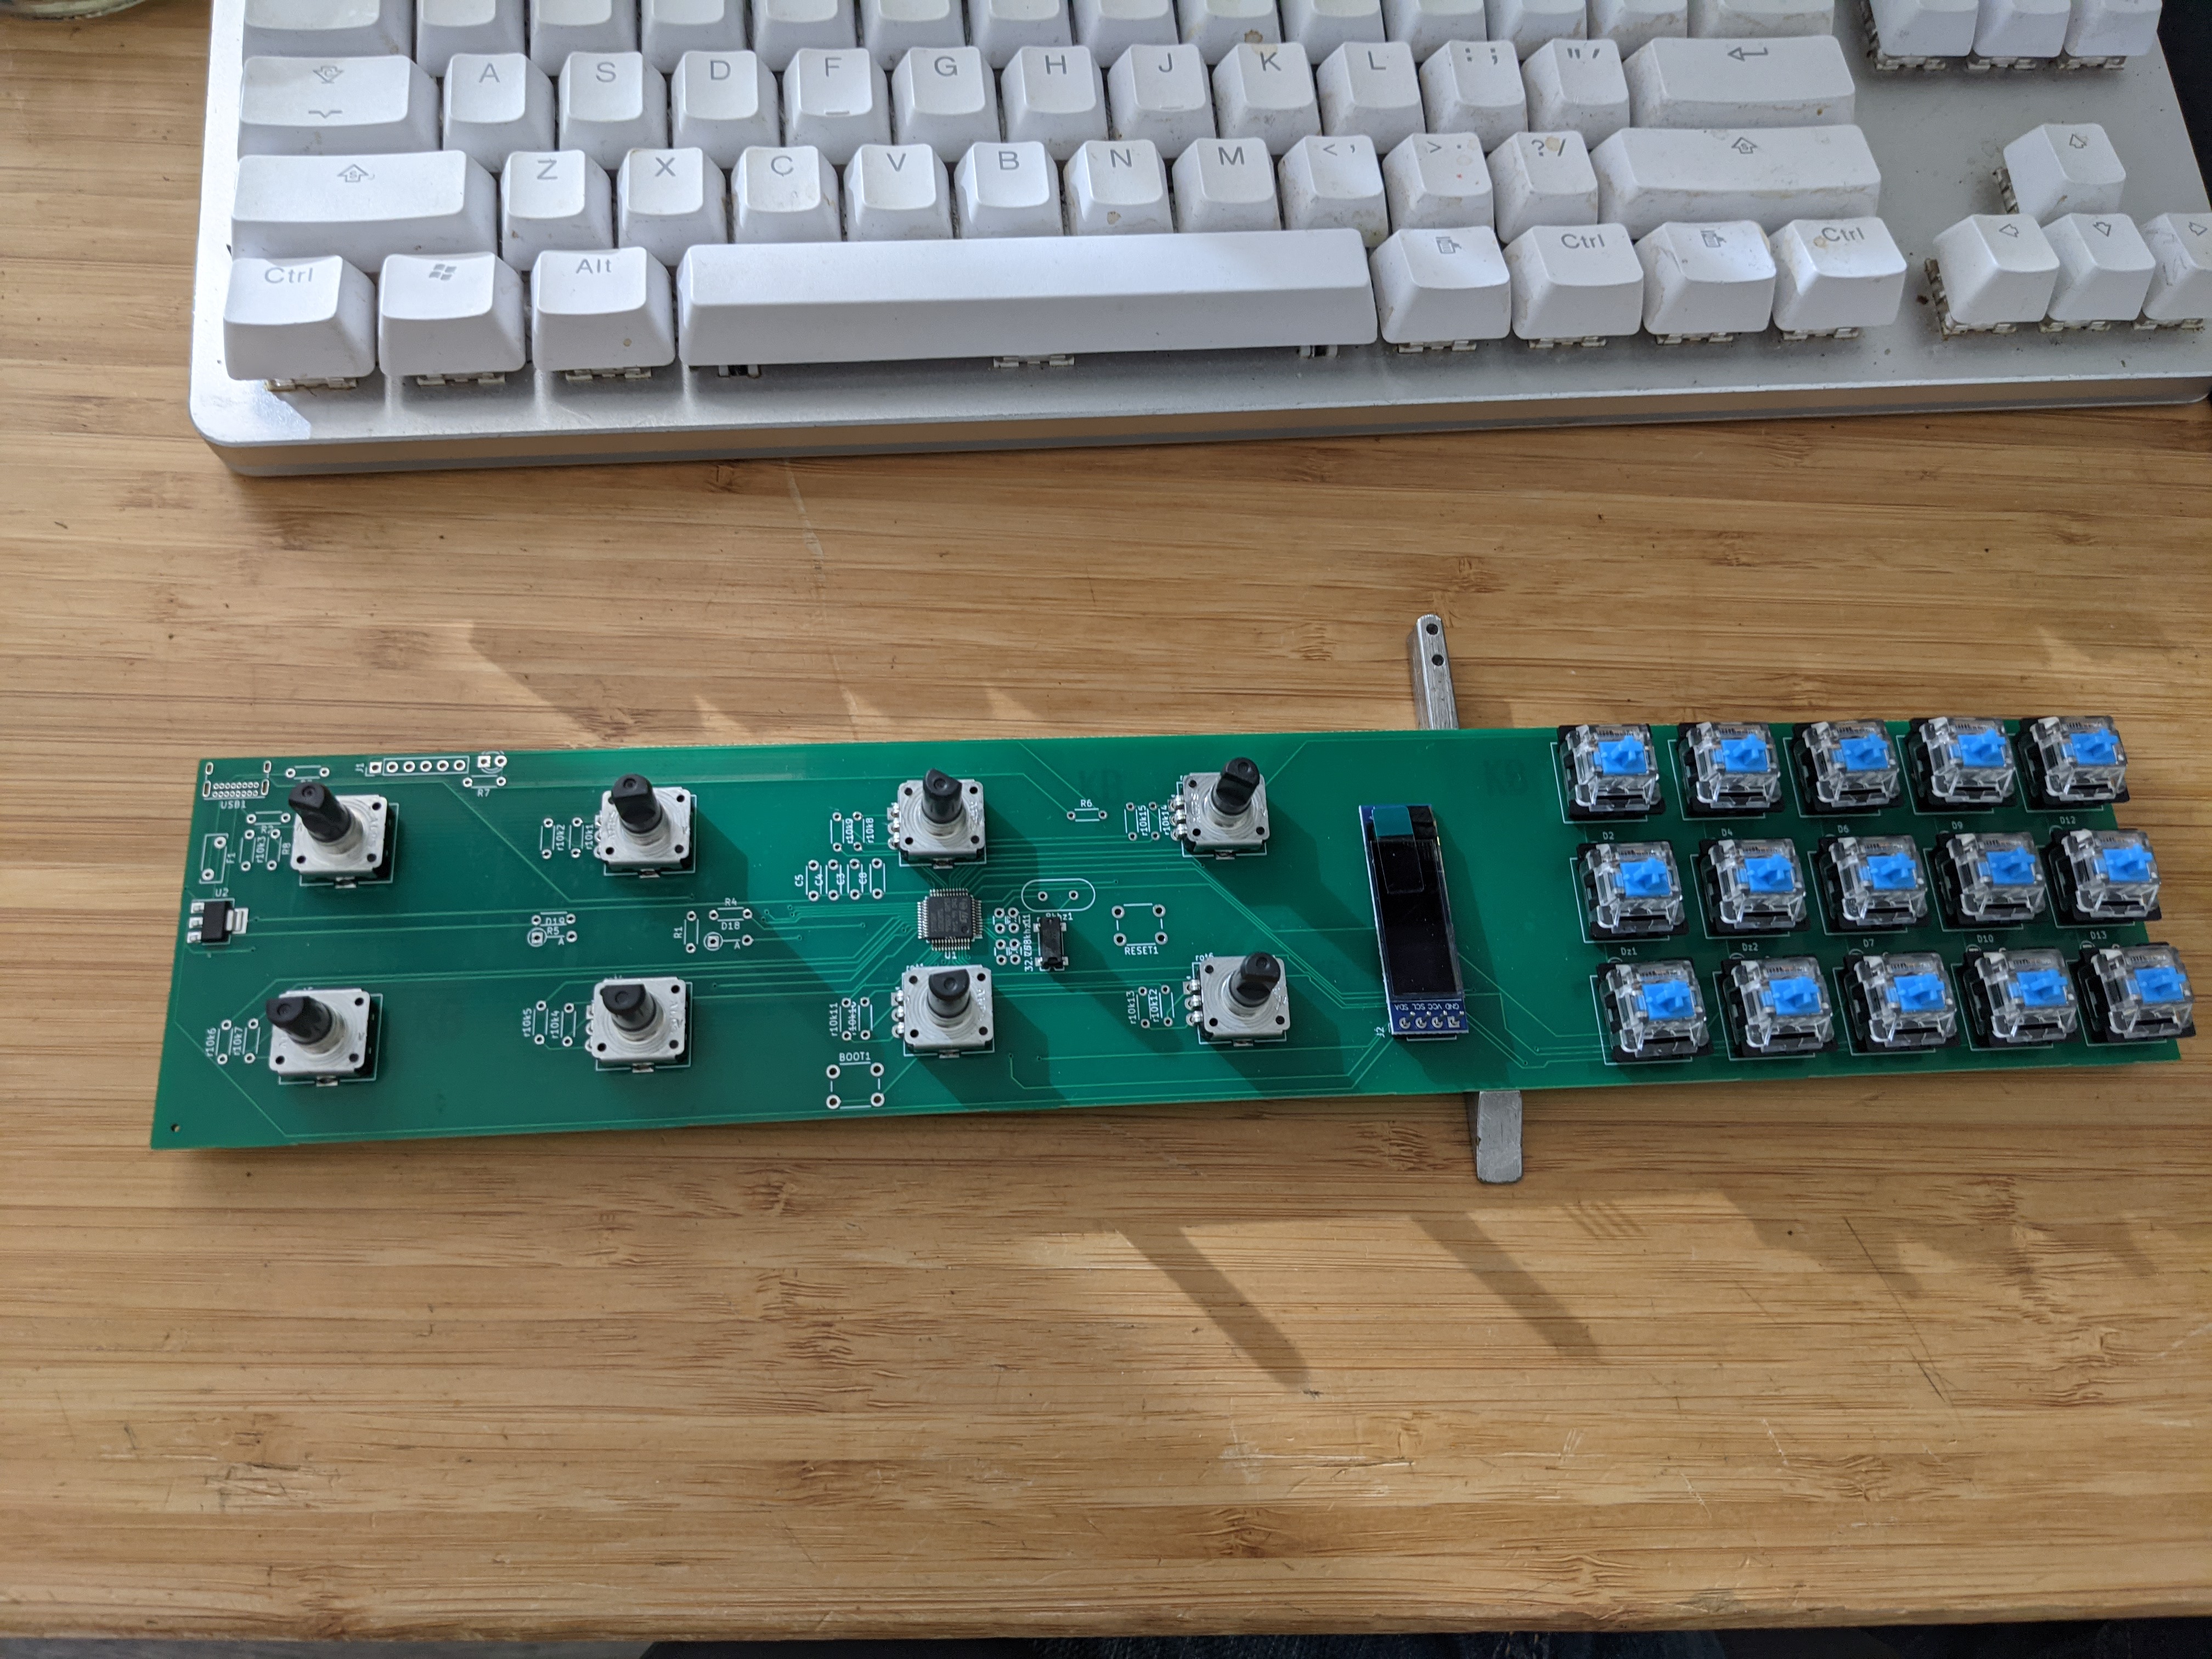
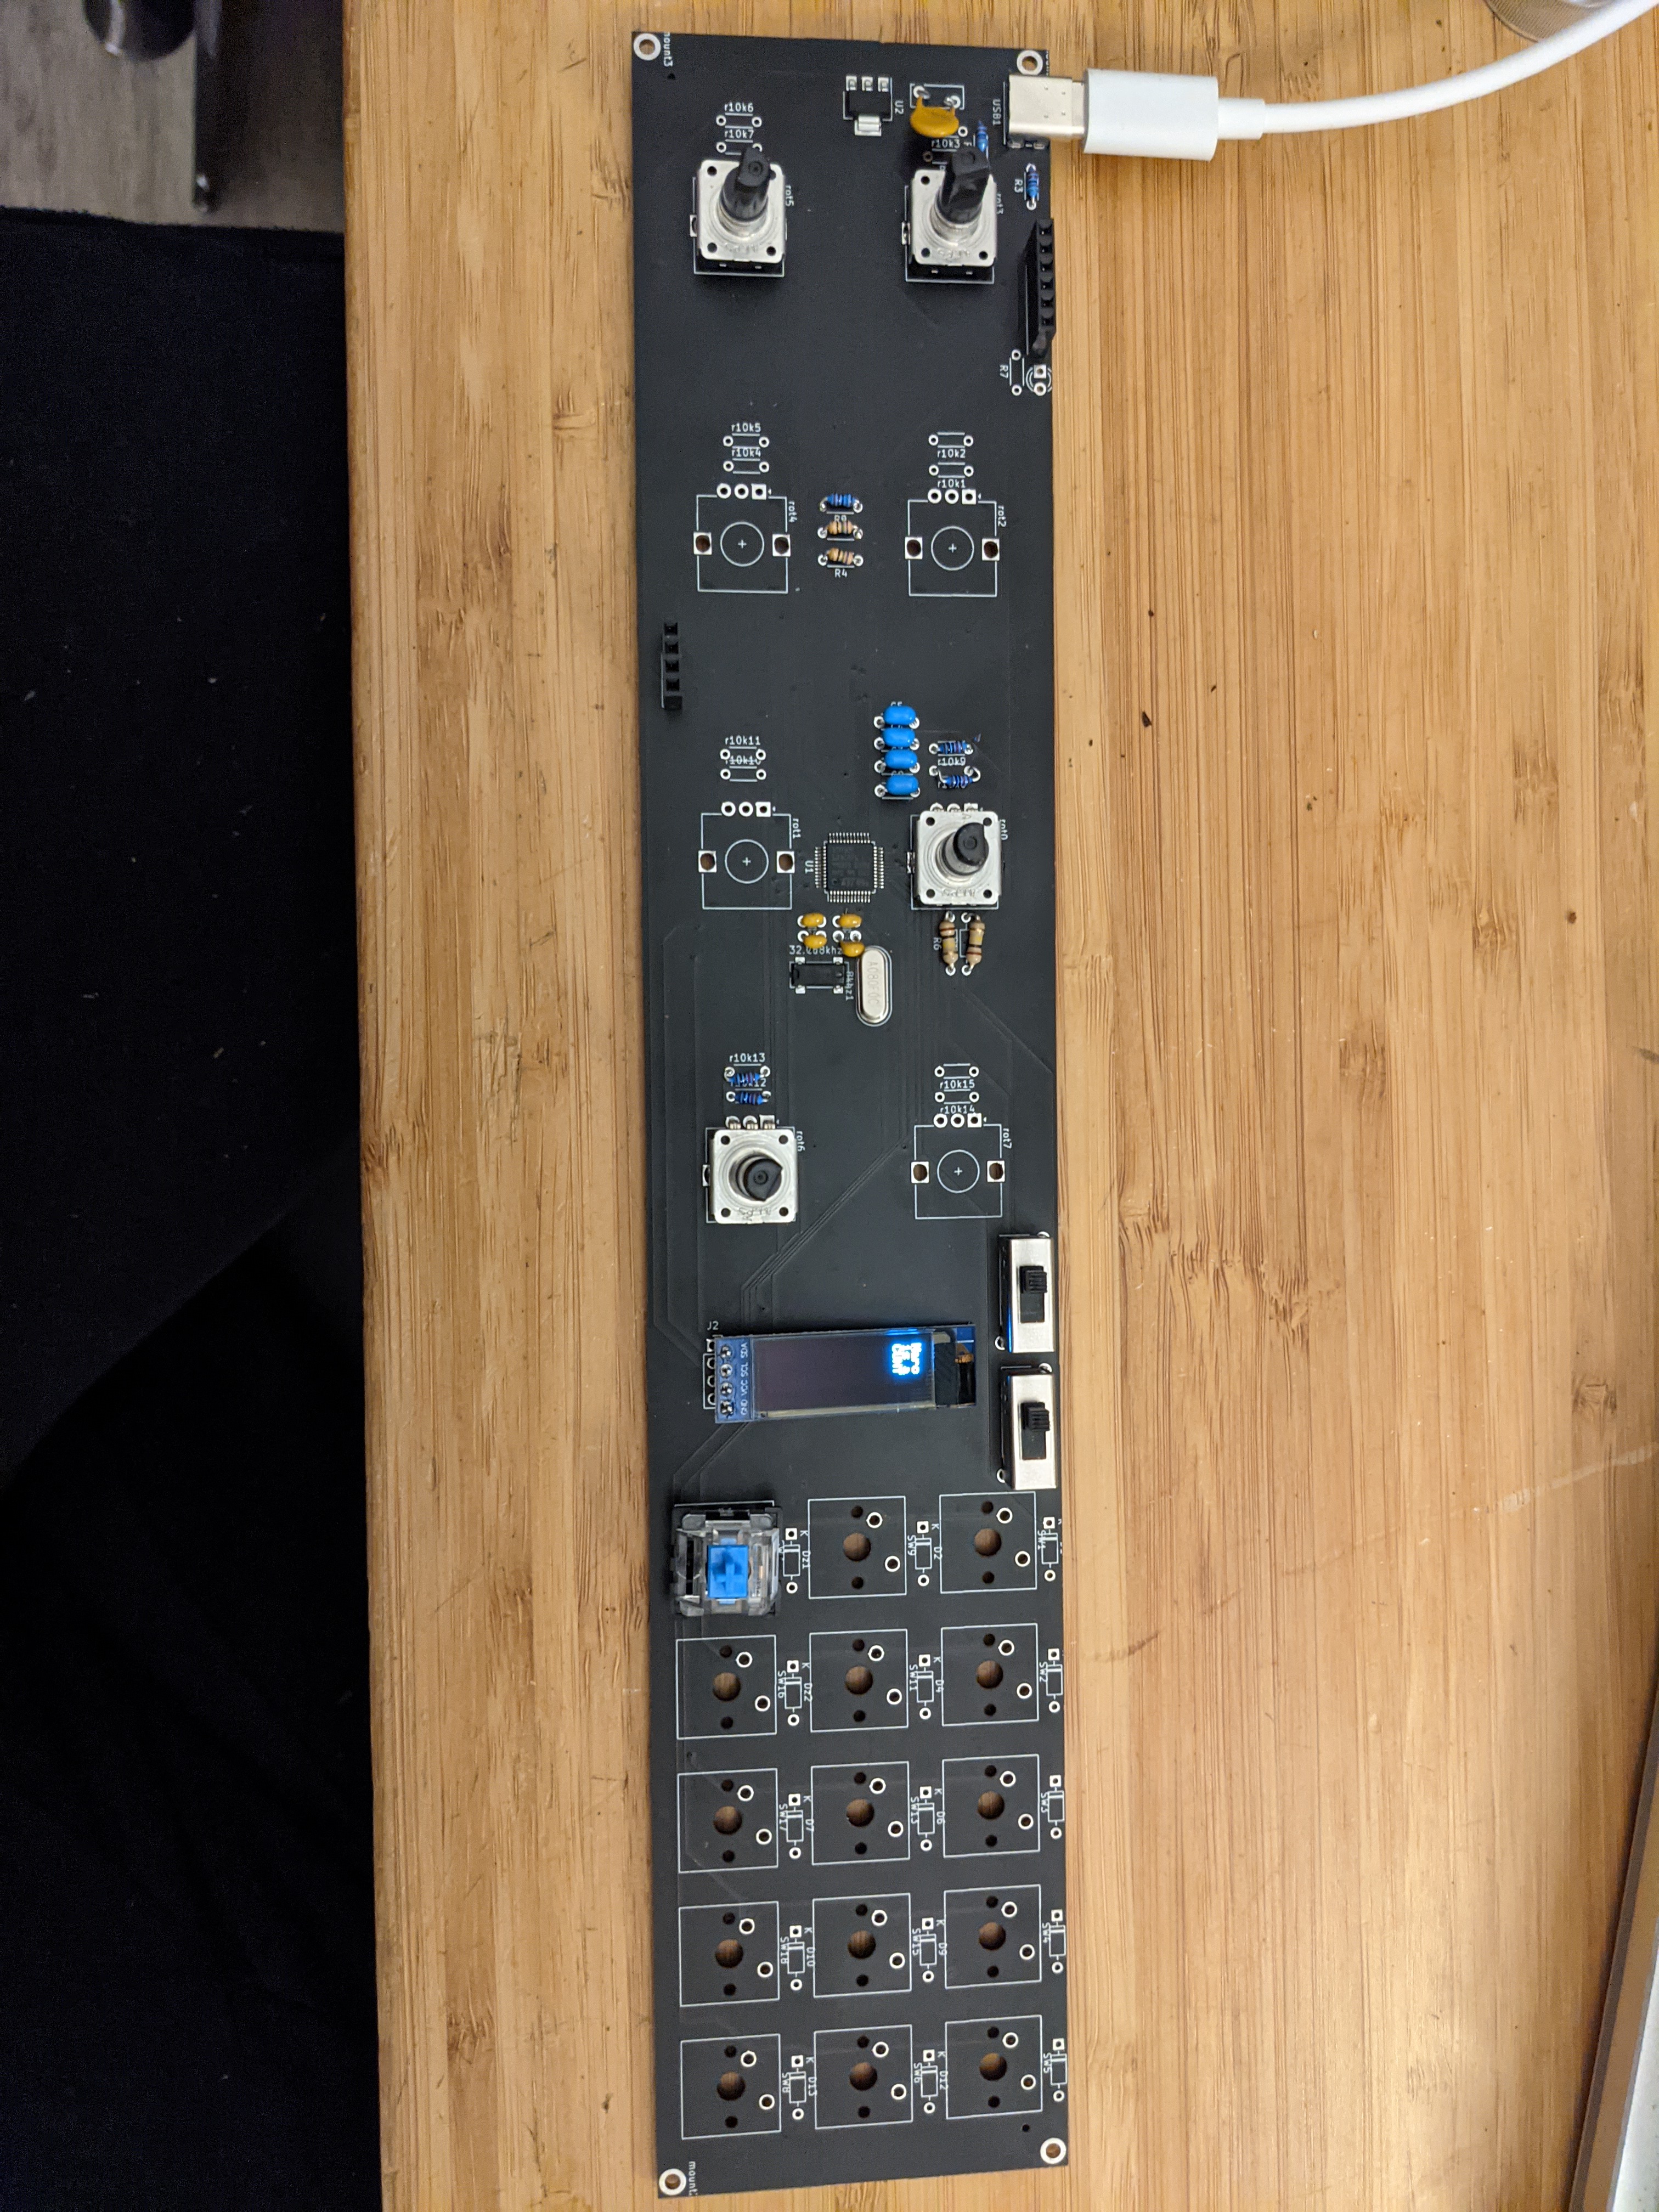
A few weeks went by and my PCBs showed up. It was super exciting to be holding something I designed in my own hands. I soldered on all the main components. Using both a soldering iron, and a hot air reflow station I had just acquired for this project. I powered it on for the first time, and no magic blue smoke. In-fact everything was working, now to program it.
The Firmware:
I needed a microcontroller to handle taking all the inputs and acting as a USB device that my computer would recognize and work with. After a bit of research I decided to go with an STM32 MCU. Specifically for this project I chose the stm32f103c8t6. It was readily available, cheap, had native USB support and enough GPIO to handle everything I needed.
Programming the MCU is a fairly simple process. I had 2 pins open for the STLink debug port, and a couple more for 5v and ground. Those get plugged into a programming tool and I can upload firmware files as needed. It was certainly not the fastest process. Having to make a tweak, build the firmware, save it, flash it, reboot the board, and test it. Years of web development where I make a change and see it live right away might have spoiled me some in that regard.
From here the firmware really splits into two branches. The homemade version I started on first, and a second version based on QMK. QMK is a popular option for mechanical keyboards thats widely used and well maintained in that community. A lot of what I was doing in my own code was made trivial there. The key-switch matrix just worked, and have features like debouncing built right in. The LCD screen control was also a lot simpler with QMK. But there was also some added bloat, and dozens of features that went unused. Additionally QMK technically supported multiple rotary encoders. But in practice a lot of custom code was needed for me to get everything working.
Both branches of this were built out to be fully functional. However towards the later stages of development I focused much more on the QMK version. It would be something people would look for if I ever decided to produce these in small batches.
The Software:
I had lofty ambitions for the desktop client that would interface with the controller. I wanted something that look and felt like it was provided by one of the big peripheral companies. While it has yet to fully live up to that vision it's still a really useful tool that has been rock solid over this past year.
Portions of the controller are available on Github as a public repo. Those portions being the tools and features which were not specific to my very niche device. The main big feature it provides is an easy to use interface for doing per app volume controls. In my project I gave each knob set to a specific apps volume. Allowing me to lower Spotify or raise Discords volume while in game without any alt-tabbing.
The volume level and app name is shown live on the built in LCD as you make changes. So if you turn up Spotify from 60% to 90%, you'll see Spotify across the top and a live visualization of the volume filling up as you turn the knob.
The key switches on the right are all bound to custom actions. Internally these utilize function key codes. You're probably familiar with function keys F1-F12, however under the hood there are a bunch more that can be used like F13-F24. The desktop app listens for the HID message letting it know what key was pressed. And then checks what the currently saved config maps that key to. As I mentioned above, that can map to a key like F16. But it could also run a custom command or action. Such as clearing the LCD, typing a saved string, or opening your email client.
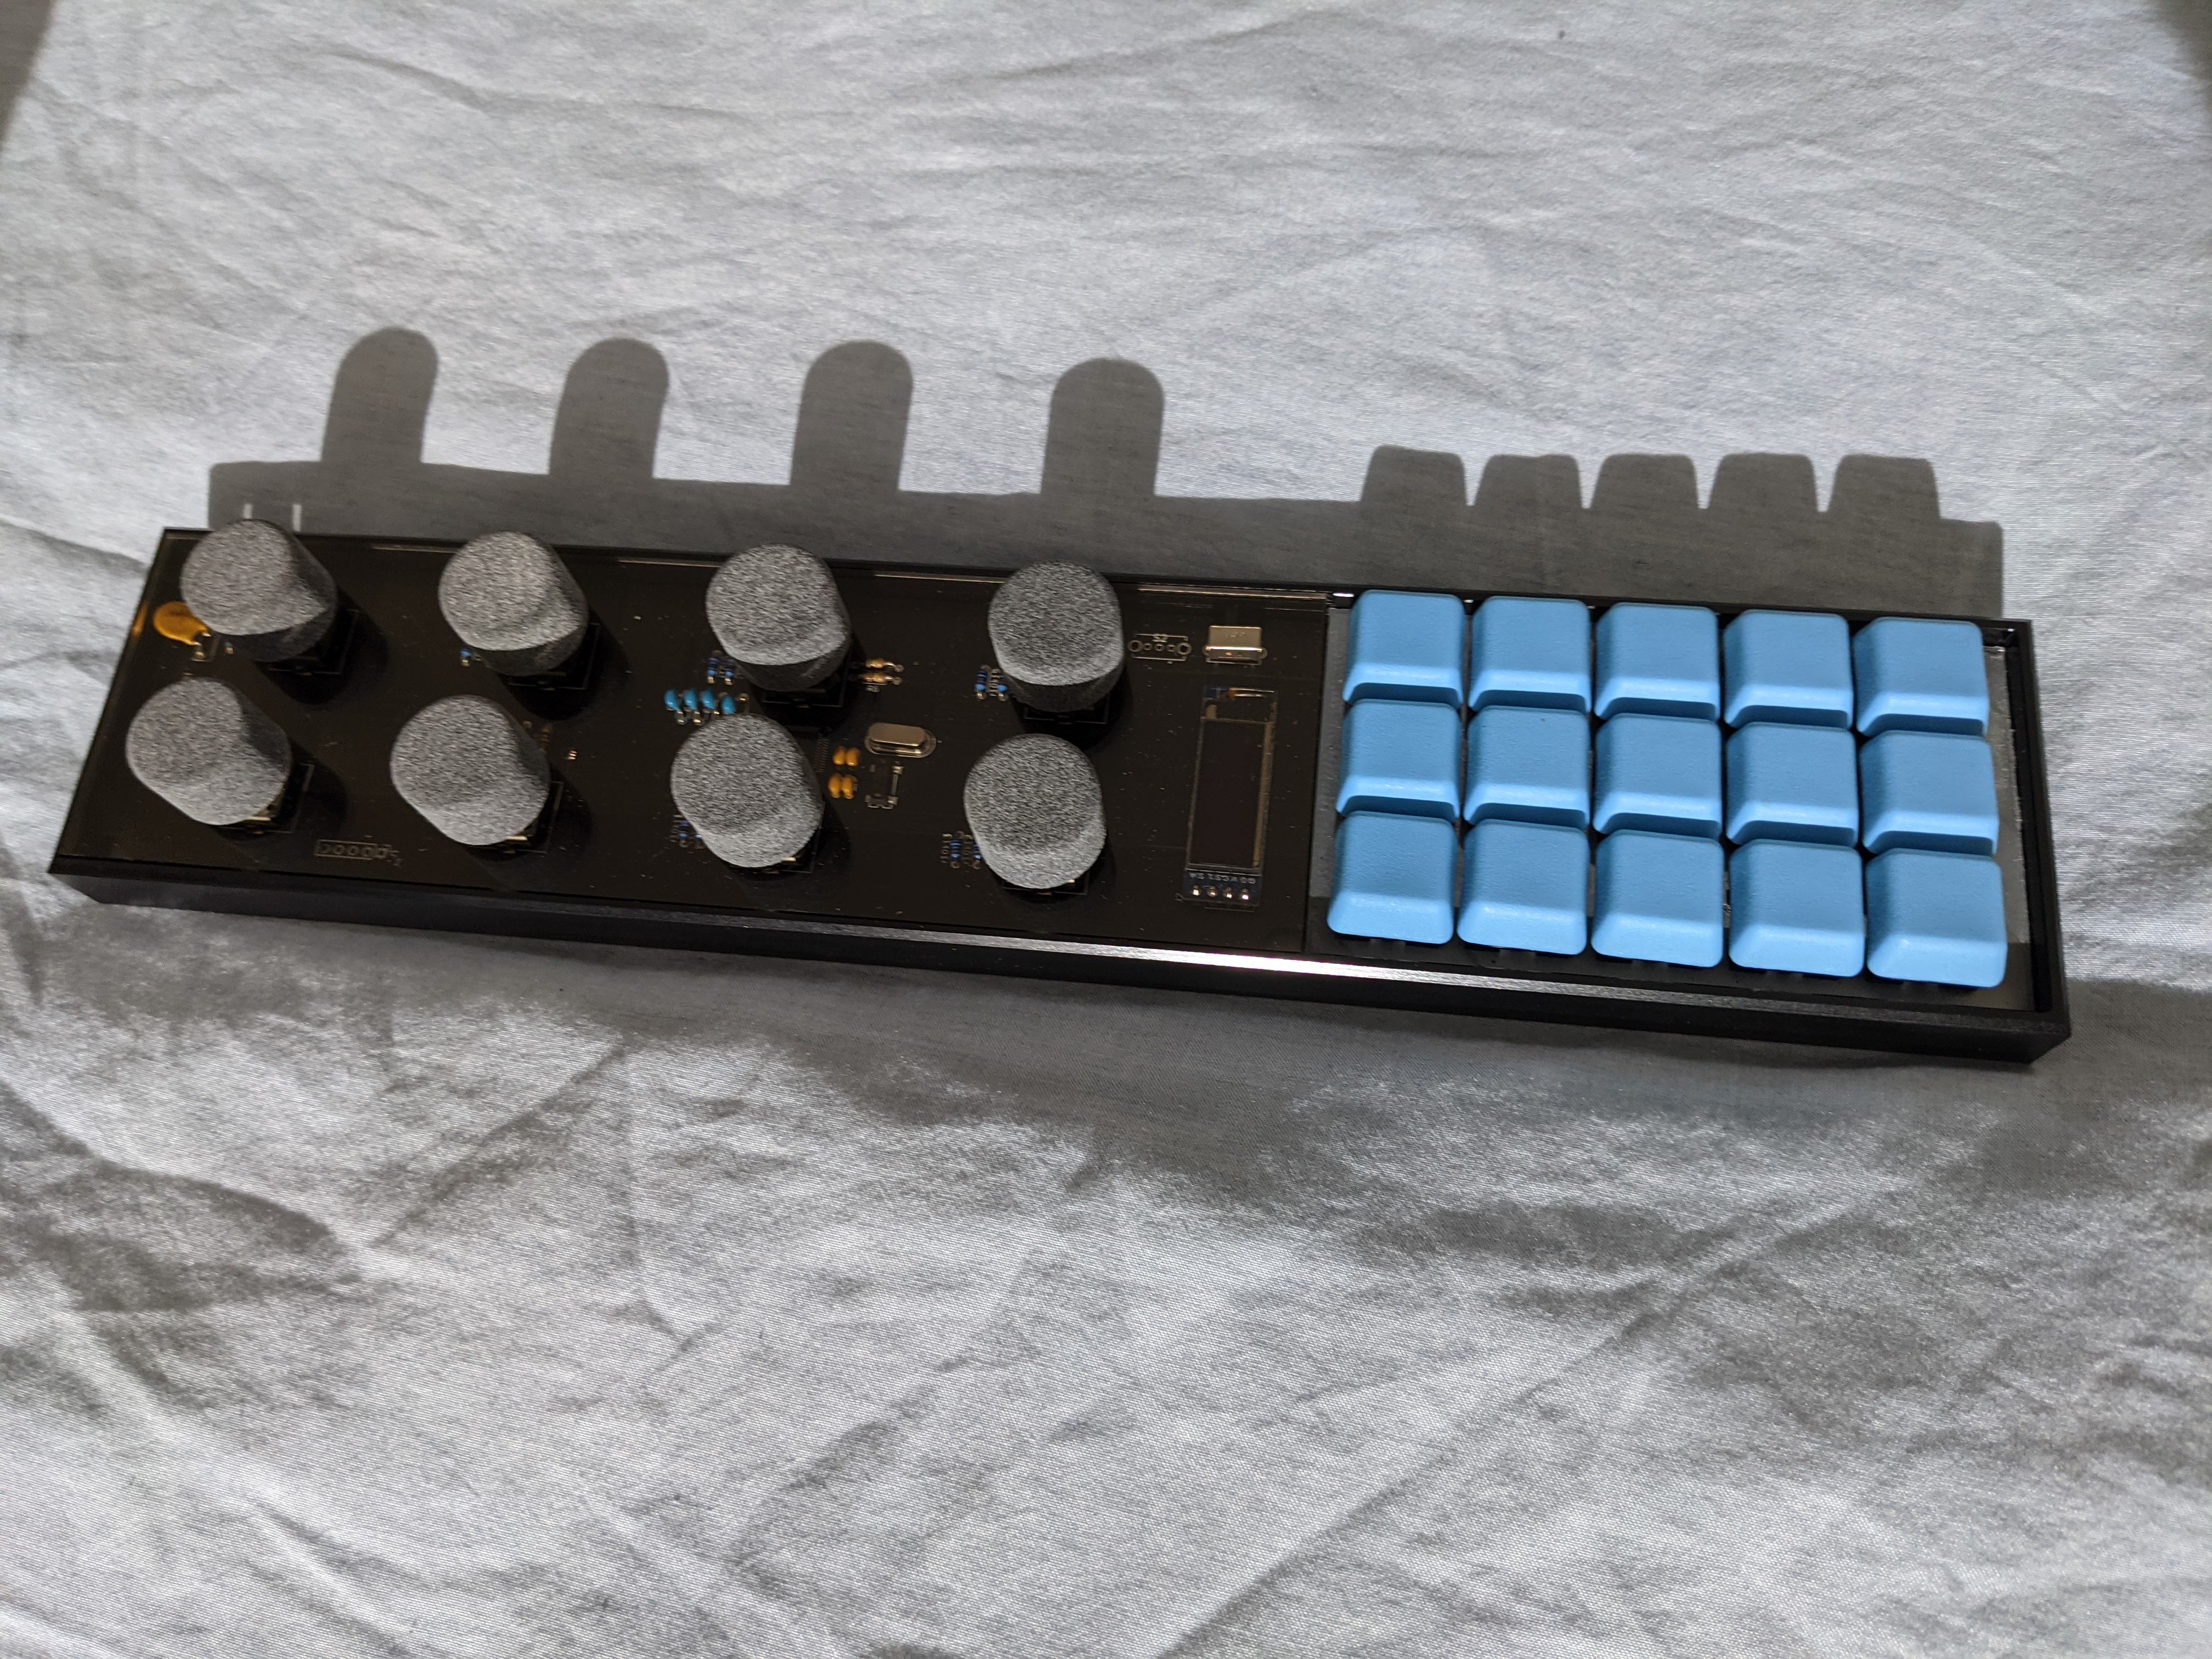
The "Final" Product:
The current version has been sitting on my desk and seen daily use for about a year now. Its been an absolute pleasure to use and Im very happy I decided to do this project. I learned a lot about 3d modeling, 3d printing, PCB design, MCU programming, and half a dozen other skills. I had this idea for something and made it a physical thing and that was a very challenging and rewarding process for me.
There is currently no plan for any small batch runs to sell is this to the handful of people that reached out on reddit and discord to buy it. This is ultimately because of the cost to manufacture a product like this. The CNC Aluminum case I have on mine cost me over $200 to get machined. I'd have to sell these for 4 to 5 hundred dollars to see any kind of profit and would easily take weeks or more of work.
Below is a small portion of the images, renders, and designs I made during the year I spent working on this project. For more info please feel free to reach out to [email protected].